JG Gspec Upgrade Build Part 1: Power and Durability

Introduction:
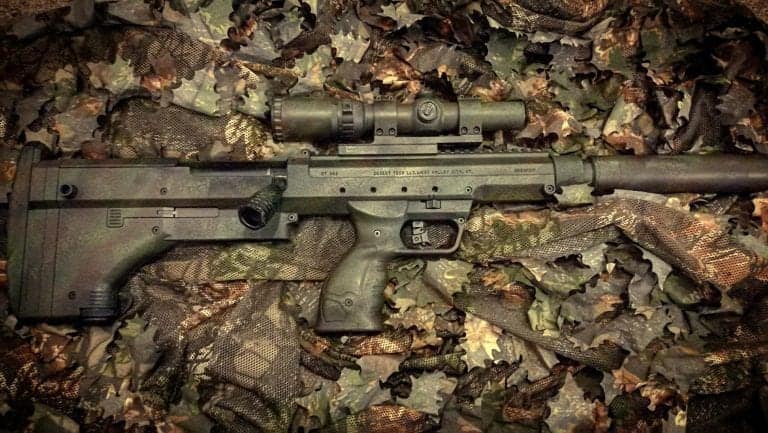
I recently picked up a JG Gspec as a cheap base gun to do a build guid/upgradee on. I Sniper Rifle was purchased from https://www.airsoft-entrepot.fr/ , I recommend them as they are good on pricing and customer service, delivery is a fixed cost of €19.90 which is good if you’re buying a RIF or a load of parts, not so good for smaller items though.
This build guide is a low/medium budget build, using parts which for the most part I’ve used with good success before without breaking the bank. Other builds later down the line will be medium/high budget.
This is a basic build guide as there are 101 online for VSR based rifles, this is more of a high level summary, covering some of the issues you can run into with clone rifles, how to resolve, DIY tips and overall guidance on some parts which work well.
Part 2 of the build will be coming in the next week or so once the accuracy/range upgrades arrive. So I won’t cover any performance pieces in this part as it won’t be a true reflection of the installed parts.
Initial Thoughts:
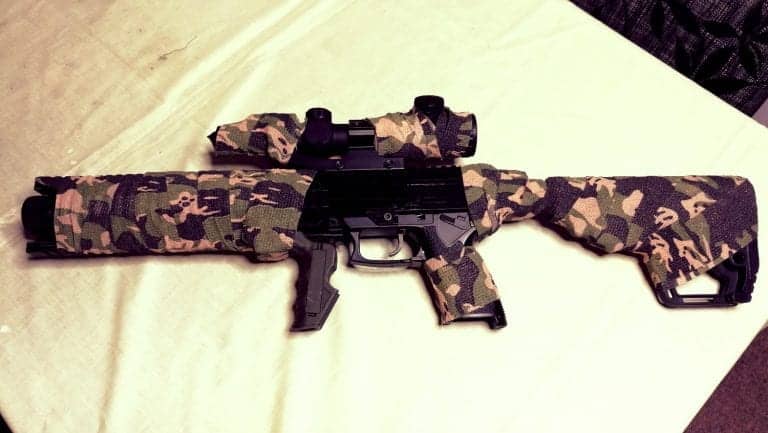
I picked up the cheapest model of the Gspec (367ks), which came in at about £110 all in. Once the gun arrived I realised quite quickly why it was so cheap…..The bolt was made of some incredibly flimsy metal, equally as bad if not worse than the FN SPR cylinder. The scope was some non-functional piece of crap. The suppressor was hollow; albeit it comes with the plastic swiss cheesed tube which was handy.
Overall the action of the gun was pretty bad and I could tell it was only going to get worse inside. It’s worth noting a normal JG Gpec comes with a relatively good cylinder and cylinder head, so it’s just this particular version which I’d advise against.
Performance Stock:
This gun felt so bad to cycle that I didn’t even bother to test the stock performance beyond chrono it, which was about 360fps on .2s with massive variance between shots.
JG Gspec Disassembly:
Disassembly of the gun is the same as any VSR 10 or VSR based clone, you need to make sure the gun is not cocked and the mag released. Then you’ll need to remove the two stock screws.
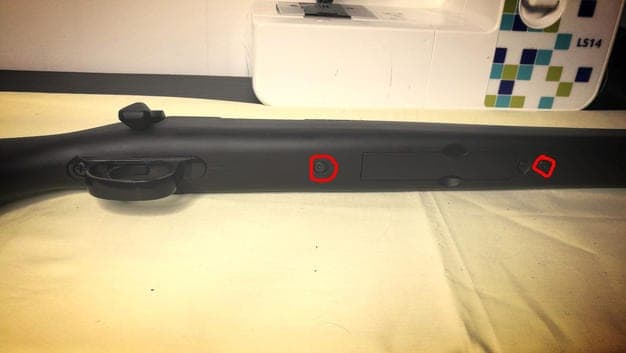
Once these have been removed you can pop the receiver and outer barrel out from the stock.
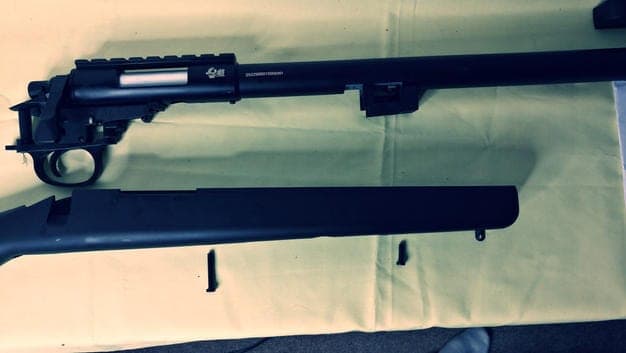
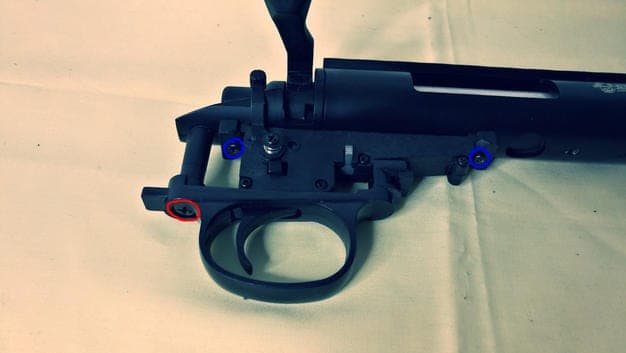
For the moment you can put the stock aside as you won’t be needing it for a while. Next you’ll need to remove the trigger guard and trigger unit by removing the screw circled red and the two screws circled in blue.
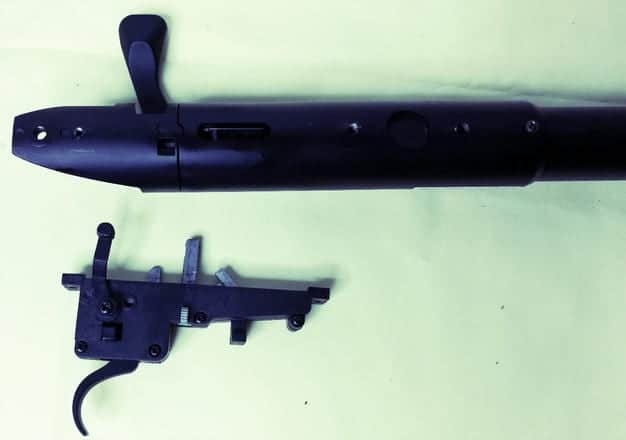
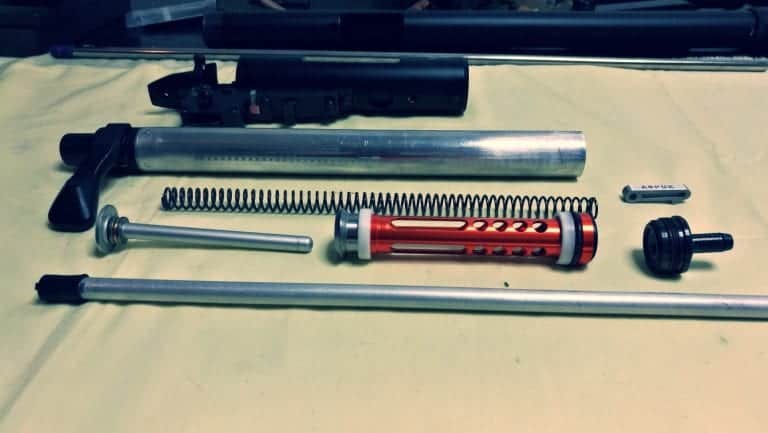
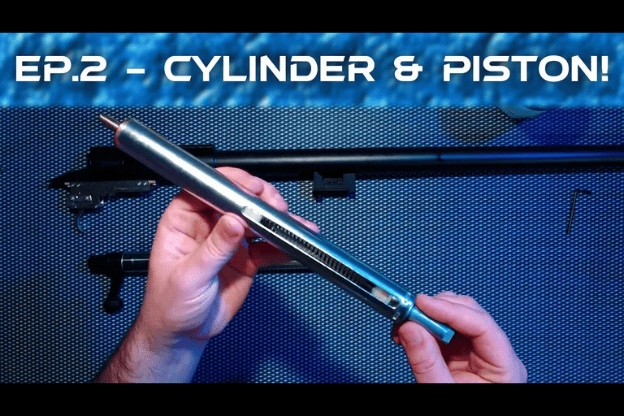
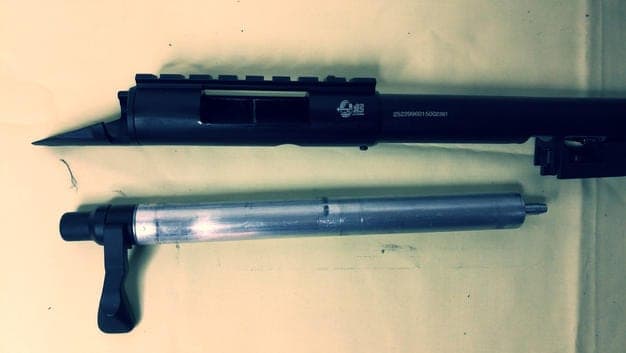
With the trigger unit removed you can slide the stock cylinder out. As you can tell by the image below, the stock cylinder is a terrible quality and nothing like the normal one a JG Gspec/JG Bar 10 comes with. This is because I purchased what I gathered was the budget version.
Using a pair of needle noses pliers you can unscrew the cylinder head to reveal the stock cylinder internals. These are pretty standard quality parts and won’t last long.
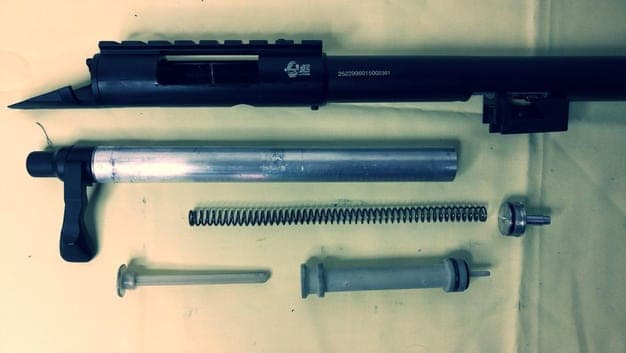
Normally at this stage you would keep the cylinder as the JG one that comes with the normal version JG Bar 10/JG Gspec can actually handle 500fps as can the stock cylinder head. However these parts may as well be chucked.
Next you’ll want to take the bolt handle off in order to install it into the new cylinder. This is done by removing the bolt in the end with an Alan key.
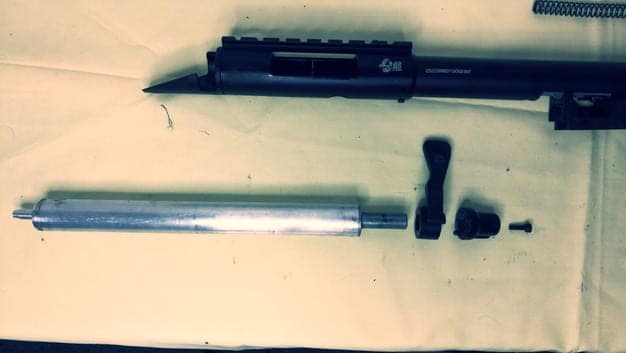
Once you have the gun stripped down to the part, you can go ahead an install the new parts.
Upgrade Parts Used:
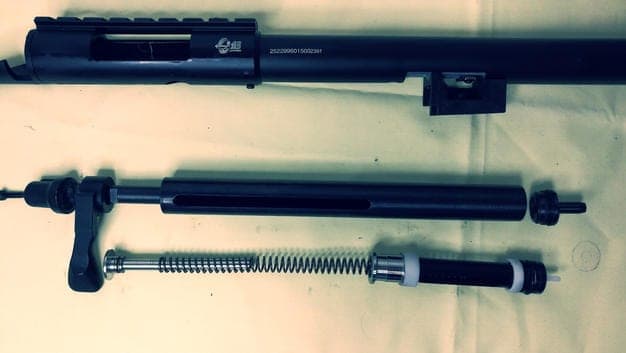
Airsoft Sniper Parts (ASPUK) Steel Cylinder
Airsoft Sniper Parts (ASPUK) “Sniper One” Spring Guide
Airsoft Sniper Parts (ASPUK) “Sniper One” Piston (Installed after the Action one)
Action 90 Degree Airbrake Piston
PPS VSR 10 Cylinder Head
Springer Custom Works “S-Trigger”
Airsoft Pro Hop Arm
To start with, you’ll want to lube everything up (silicon oil/spray for me) and then install it into the new cylinder, alongside installing the bolt handle on this cylinder.
Some DIY tips here are to wrap 2-3 layers of PTFE tape around the cylinder head threads, on the piston if the o-ring is small or loose in the cylinder, take it off, put PTFE tape in the grove where it was then install the o-ring over it, this will help push it out and create a batter seal.
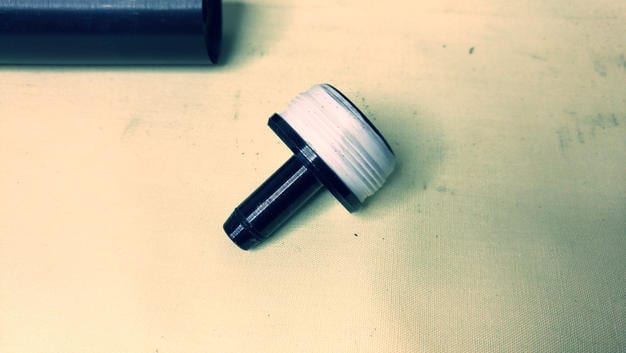
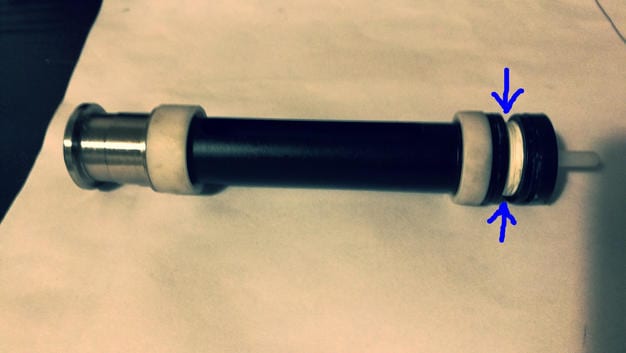
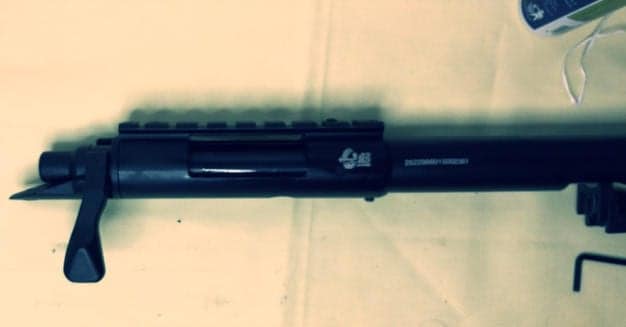
Once everything is installed, you can install the cylinder into the receiver. Make sure that nothing is grinding or catching. For this particular build I ran into some issues, one was the condition of the receiver as shown below, sometimes you may find the screws which hold the scope rail on can protrude into cylinder channel so make sure they aren’t.
Next is installing the trigger, again I’ve opted for the Springer customers Works S-Trigger as I really do like them and they just seem to fit and worth in everything I put them in.
The picture below shows the stock plastic 45 degree trigger and the S-Strigger.
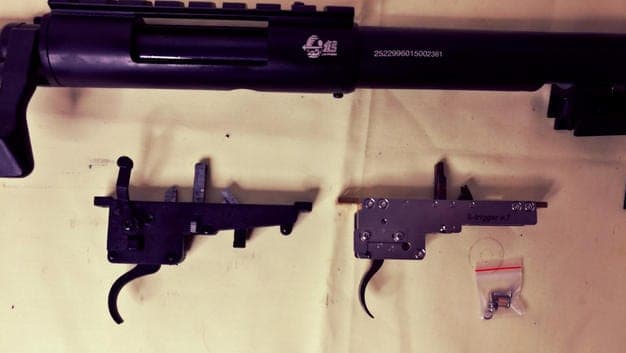
To install the trigger, firstly you’ll need to remove this spring guide stopper, this is held in with one screw on the right side of the trigger unit. With this removed you can install the trigger into the receiver, which is as simple as installing the two screws circled below, then install the spring guide stopper and secure it in place with the screw.
Once you’ve done this you’ll want to remove the safety lever and spring from the old trigger and reinstall on this one using the parts provided. DO NOT SCREW IT IN TO TIGHT OTHERWISE YOU’LL DAMAGE THE SEARS.
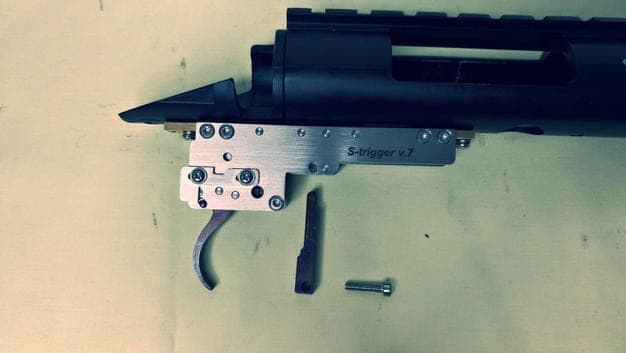
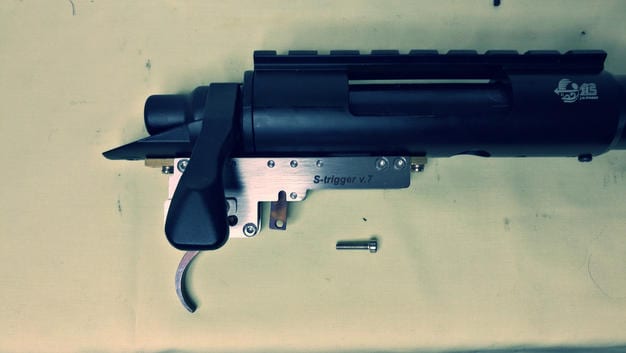
Now everything is installed, cycle the bolt to ensure that everything is move smoothly and that the gun is locking back ok and not slamming forward, the bolt is able to be pushed forward with little effort after cocking and that nothing is grinding.
Unfortunately at this stage in the build, a few problems became apparent which I’ll cover below.
JG Gspec Issues:
This build was frustratingly full of small issues, 90% of which related to the shocking quality control on this particular JG model. The other 10% was a faulty part.
My first issue was a large seem in the receiver which caused some grating and large amounts of friction when cycling the bolt.
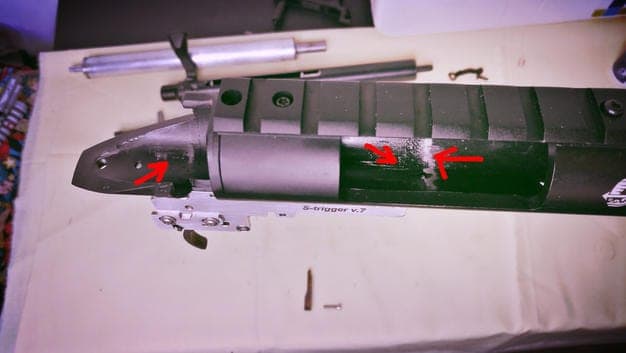
I resolved this by stripping the receiver down and sanding down the burrs/seams so that they were no longer making contact with the cylinder as it cycled. Without the trigger installed the bolt was cycling really smooth, however with the trigger installed I came across the second issue…..
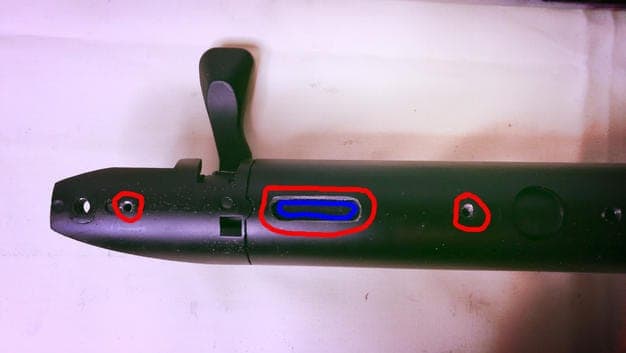
The trigger screw holes where not aligned by 1-2mm which essentially meant the sear and spring guide stopper were sitting in the receiver slightly canted to the left, causing them to drag across the cylinder and the resistance meant the sear would lock back in open position stopping the cylinder from returning and making the gun impossible to cock.
Annoyingly there was nothing I could do about the screw holes, as widening the hole simply wouldn’t work. So as it was only 1-2mm causing an issue I decided to sand the opening where the spring guide stopper and sear sit, just by a few mm to remove enough material for them to sit in place without making contact to the receiver and caching. This worked for me and allowed them to move freely, resolving the issue.
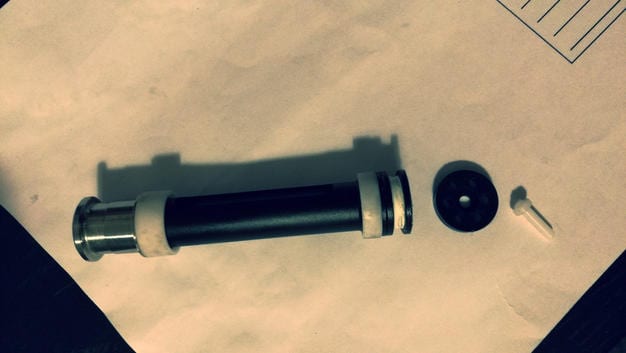
The final issue I came into was the Action 90 Degree piston…….Simply put it was simply just a bit crap. It gave a really inconsistent FPS reading, after no more than 10 shots the sorbo pad came off and the plastic airsoft became bent. I immediately swapped this for an ASPUK “Sniper One” Piston I had purchased for another upcoming build.
JG Gspec Final Thoughts:
JG Bar 10/JG Gspec rifles are a good base gun to upgrade, usually considerably cheaper than the Tokyo Marui and certainly a good beginner rifle to do a build on. My personal builds are usually TM base guns, but I’ve had JG’s in the past and they are fine, I’m certainly not above using them and I do actually prefer the finish on the JG stock.
Nearly every issue with this gun was down to the shockingly bad QC, which from my experience isn’t a huge issue normally with the JG Gspec/JG Bar10 series, so it must be this particular budget more. With that in mind, make sure the version you purchase is the one with the metal hop/magazine block and metal trigger, normally they have a nice polisher looking cylinder too.
As soon as my other parts arrive I’ll do part 2 which will focus on the accuracy/range upgrades.
Remember to like, share and subscribe if you want to see me do more builds, reviews and projects.
Links:
Parts – Empire Airsoft
Other Guides
Remember guys, if you’ve enjoyed this post or any of the other content I’ve put out, please check out my other platforms and consider becoming a Patreon

